Operation & Usage:
The Jumbl Scanner is powered via USB connection to a computer.
Press power button to turn device on/off
The scanner has about 128MB of storage space, enough built-in memory to store approximately 40 digitized images. You can use an external SD memory card to store many more images. When inserting an SD card, be sure that its gold connector strips are facing upwards. (If no SD card is in the unit upon power-up, display will read “No Card”.)
Scanner Settings:
From Main Menu, Press Left/Mirror and right/Flip to highlight and adjust a number of scanner settings:
Language: Defaults to English. Enter Language Submenu to select between 8 supported languages. Press Left/Mirror and Right/Flip to highlight your preferred language, and confirm selection by pressing OK/Enter

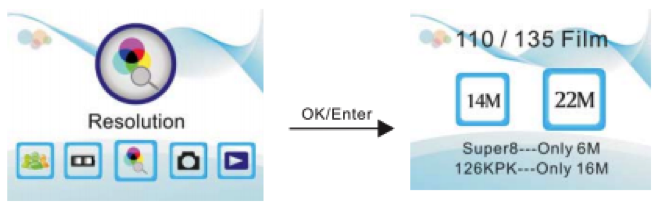
Resolution (only for 110/135 film) : Enter the Resolution submenu to select either 14 megapixels or 22 megapixels (interpolation) image conversion (14M will be the default configuration). Press Left/Mirror or Right/Flip to highlight your preferred image quality, and confirm selection by pressing OK/Enter. Please note: Resolution selection is only available for 110/135 (35 mm) films
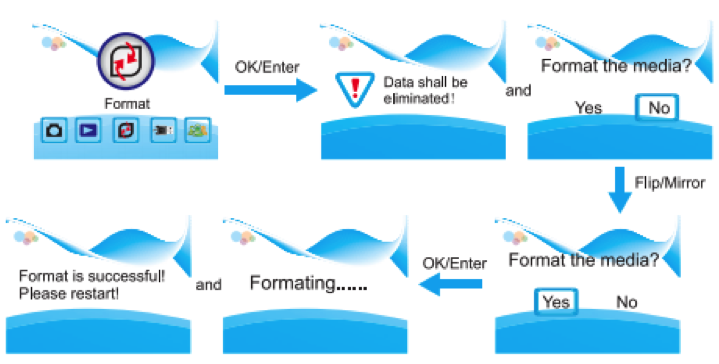
Format/Delete: To delete all previously saved data from internal memory, enter the Format submenu.
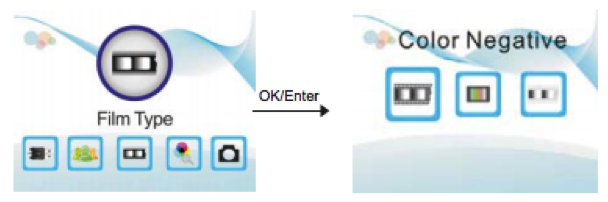
Setting Film Type:
To ensure the scanner correctly captures the images on your film, it is important to set the device to read your film type.
When powering on, the Capture menu item will be highlighted by default.
Press Left/Mirror twice to highlight the Film Type menu item.
Press OK/Enter to enter the Film Type submenu
Use the Left/Mirror and Right/Flip to select your film type, and confirm your selection by pressing OK/Enter. The most common choices are Color Negative and Slide Positive
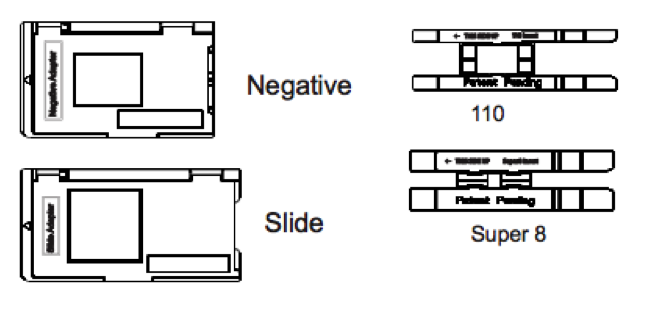
Selecting the Correct Adapter:
Once you’ve set the scanner to the correct film type, be sure to use the proper adapter for the job. Included are 2 adapter plates and 2 adapter inserts, each precisely cut to accommodate a particular type of film:
Slide Adapter (35 mm)
Negative Adapter (35 mm)
Super8 Insert
110 Insert
Before inserting adapter, set down scanner on flat, stable surface with LCD display facing you.
Ensure “This Side Up” side of adapter is facing upwards.
Ensure small arrow on adapter is facing leftward.
DO NOT insert any plates from the left side of the scanner. Carefully insert the adapter plate (with the little arrow facing up and into the scanner) into the right-hand side of the scanner until it snaps gently into place.
To use Super8 or 110 Insert, open negative adapter fully and place on flat surface.
Place Insert onto lower panel of negative adapter, and align in place with adapter’s square cutout.
Note: that 35mm slide images will be slightly cropped on the left or right side - you can adjust which side is cropped by how far you insert the adapter.
Capturing the image:
Once you’ve selected all the required presets and confirmed your settings, you are ready to scan.
Use Left/mirror or Right/Flip to navigate back to the Capture menu item.
Press Ok/Enter to enter Capture Submenu, this will take you to the preview mode. you’ll be able to see your image in real-time.
By default, all values are set to 0.0, and EV (Exposure Value) is highlighted
Press Left/Mirror to darken image, or Right/Flip to brighten image.
Once you are satisfied with the EV settings, press OK/Enter to confirm and proceed to Red, Blue and green values.

Once you’ve confirmed all your settings, you are now ready to scan
To capture and save your image, press Convert/Save. (Convert/Save button is on top of machine)
To cancel before saving, press Left/Mirror or Right/Flip.
Repeat the same process for all your films/frames.
When the built-in or external memory is full, the screen will display a “Full” icon. Refer to the Connecting to computer section to transfer your images to your computer and free up more memory on your scanner and/or SD memory card.
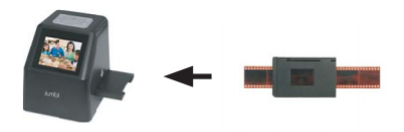
Connecting to Computer:
Transferring your saved images to your Windows or Mac computer is easy:
Connect smaller end of included USB cable to USB input on back of scanner unit.
Insert other end of cable into the computer’s USB port
From Main Menu, Right/Flip 3 times to highlight USB MSDC menu item and press OK/Enter
After a few moments, your computer will automatically detect the scanner:
Mac computers will automatically launch their built-in image viewing/editing software.
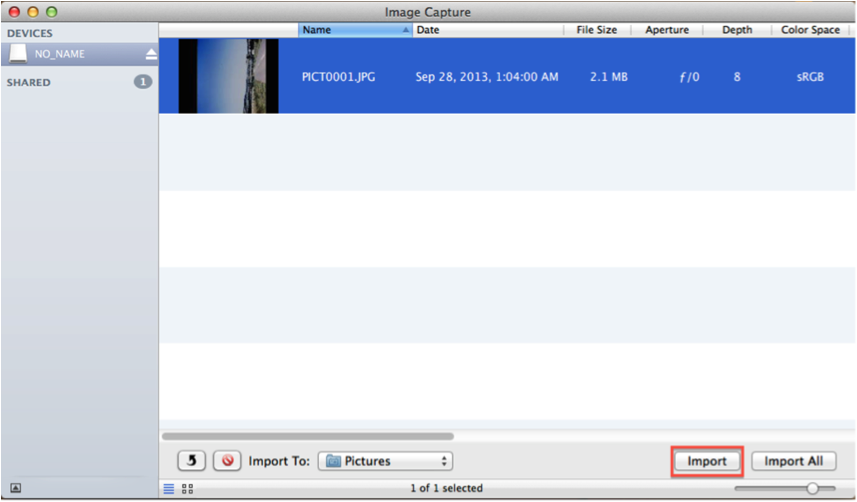
An Image Capture window will pop up on the screen, allowing you to select your images and import them to your local machine.
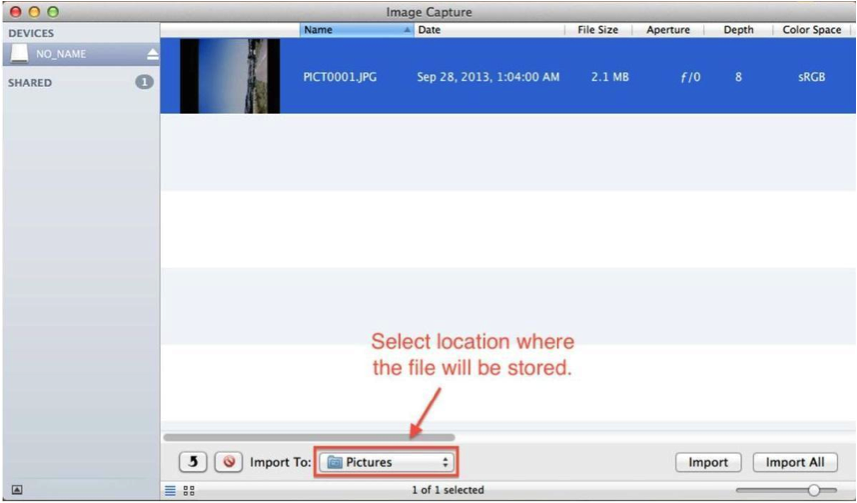
Copy/Import your saved images to your computer
Windows computers will detect it as a Removable Disk
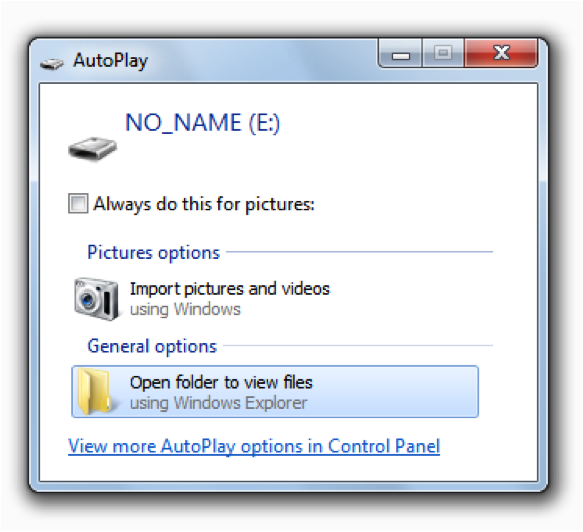
If you choose Import pictures and videos, this window will appear at the bottom right corner of your screen.

Copy/import your saved images to your computer